
Quail Cage Build Made Easy
Quail cage build made easy with step-by-step instructions and demonstration. Material list and cut list included!
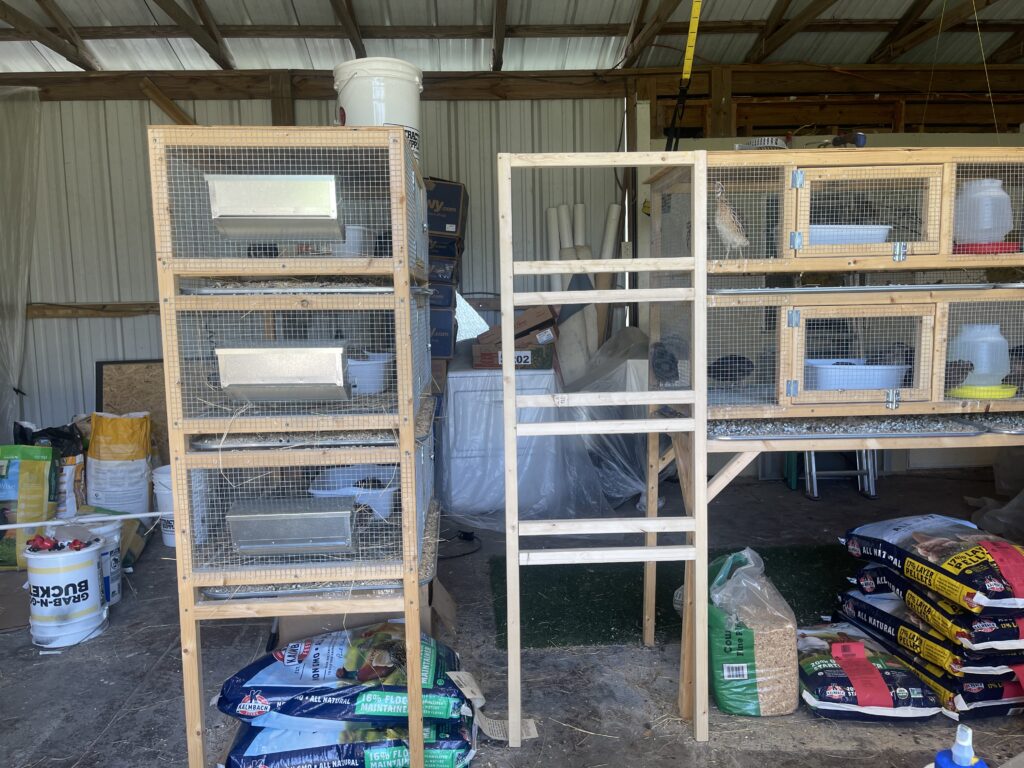
Materials List:
- 14 – 2″ x 2″ pine boards
- 5 – 1″ x 2″ pine boards
- 2′ x 3′ plywood (for roof)
- 2-1/2″ screws
- 24″ wide 1/2″ hardware cloth – 19 gauge
- 3 – 36″ oil trays (I get mine from Auto Zone or Advanced Auto. $10 to $11 ea.)
- 6 – 2″ hinges
- 3 – 2″ latches
Tools You’ll Need:
- hand drill
- 1/8″ bit (for pre-holes)
- table saw
- clamp
- wood glue
To begin building the quail cage, let’s get all of our boards cut and ready for assembly.
Cut List
Out of the 2″ x 2″ boards, cut:
- 4 – 70″ boards
- 15 – 21″ boards
- 14 – 36 1/2″ boards
- 3 – 10 1/2″ boards
Out of the 1″ x 2″ boards, cut:
- 9 – 19 1/2″ boards
- 6 – 36″ boards
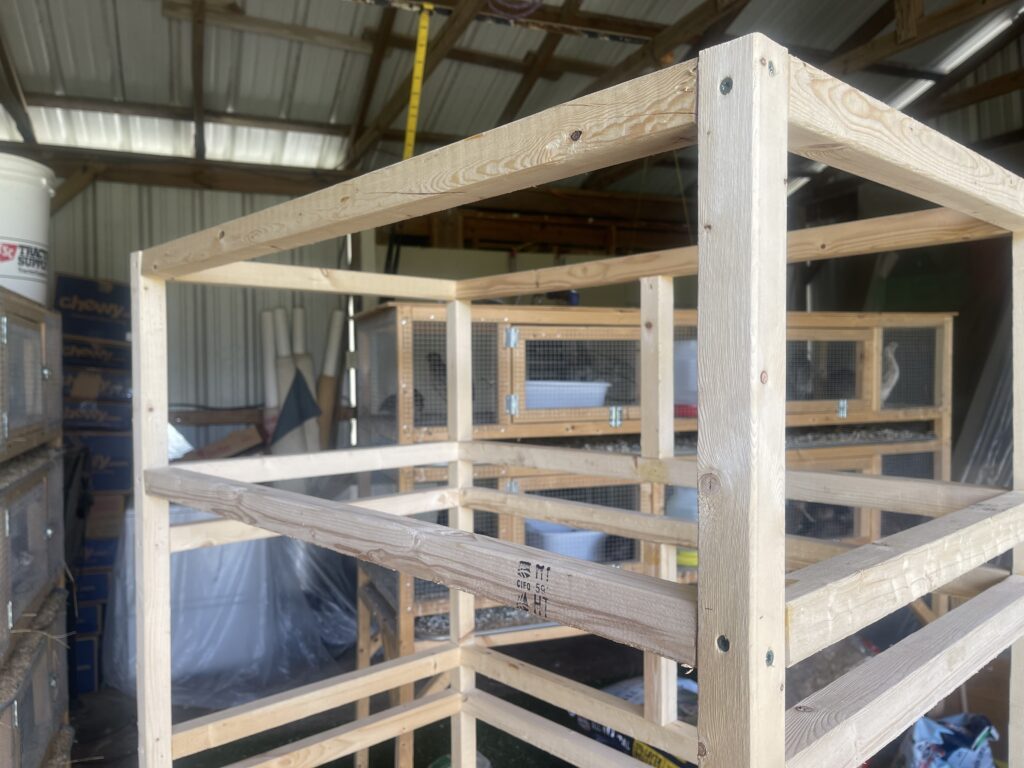
Step 1: quail cage sides
Now I love a clamp so get yours ready. We will only be using 2″ x 2″ boards in this first part of the build so put your 1″ x 2″ boards aside for now.
- Place a little glue on both ends of a 21″ board and clamp to one end of the 70″ board. Pre-drill starter hole for your convenience and then attach with the screw.
- Attach a 70″ board to the other end of the 21″ board to create the top level (roof edge) of the cage.
- Measure down 12″ from the top on both 70″ boards and mark. Add glue to both ends of 21″ board and screw into place.
- Go down 15-1/2″ from the top on both 70″ boards and mark. Add glue to both ends of 21″ board and screw into place. We will continue this process with the following measurements as follows.
- 27-1/2″ from the top, glue, screw into place.
- 31″ from the top, glue, screw into place.
- 43″ from the top, glue, screw into place.
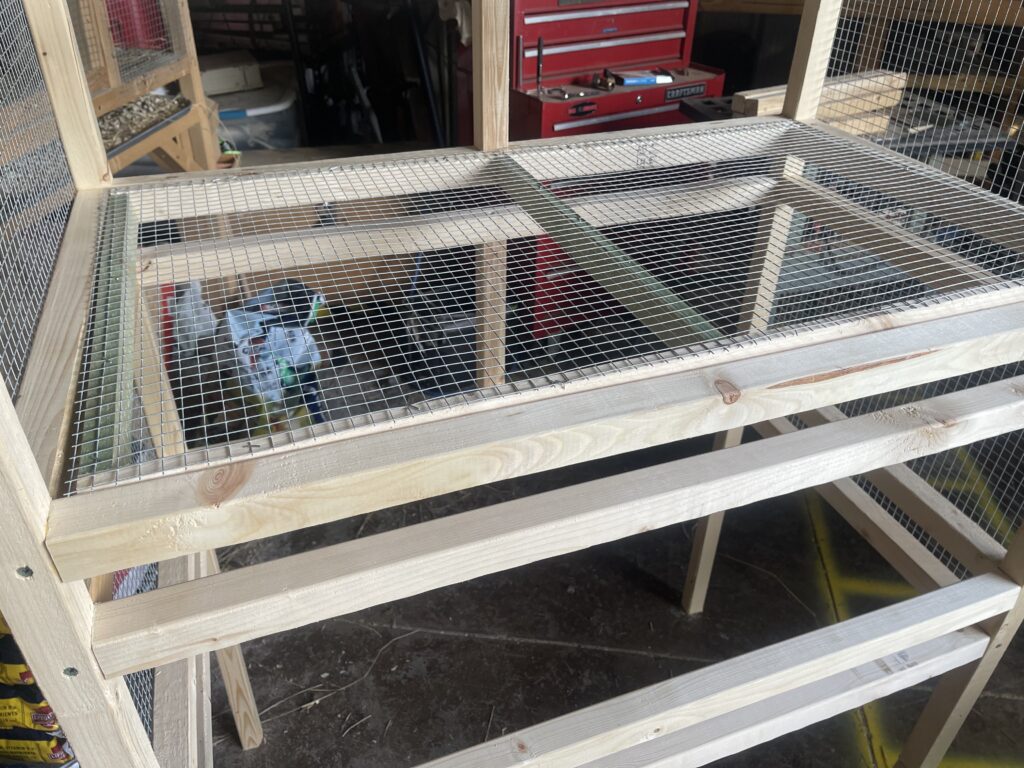
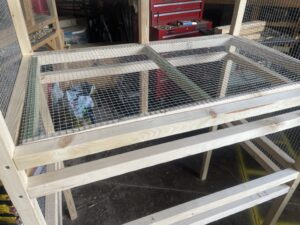
- And lastly, 46-1/2″ from the top, glue, screw 21″ board into place. It should look like the image above.
You have completed one side of your quail cage. Congratulations! You are well on your way. Now repeat this process for the other side.
Step 2: how to join the sides
First, we will ONLY join the backside of the quail cage together. You will need 7 – 36 1/2″ boards.
- Join the 2 sides together at the top.
- Align a 36 1/2″ board with the 21″ board that created the side. See photo above.
- Continue this process all the way down wherever there is a 21″ board on the side.
Step 3: how to build the front
- Take 2 – 36 1/2″ boards and place a mark at 17 1/2″.
- Join the 10 1/2″ board at the 17 1/2″ mark on both 36 1/2″ boards. Always glueing both ends and then screwing into place.
You have just framed out the front of one of your quail cages. Now repeat this process for the other two cages.

Step 4: front assembly
- Attach one of the quail cage frames you just made to the sides beginning at the top.
- Continue this process for the other two cage fronts.
- Place a 36 1/2″ board along bottom, aligned with 21′ side board. This is for your bottom tray.
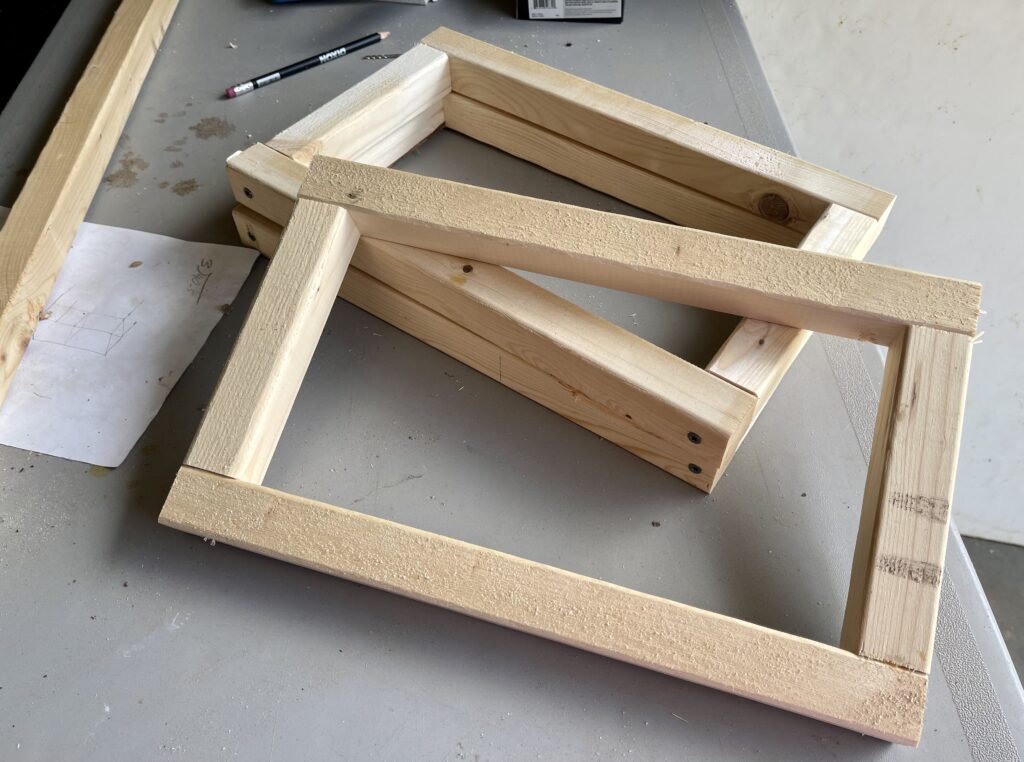
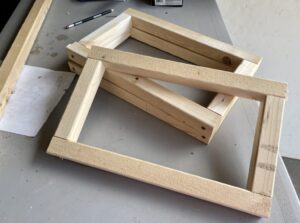
Step 5: it’s time to build the doors
- Measure the opening where you want the door to be hung.
- Subtract 1/4″ to 3/8″ from the horizontal measurement and cut 2 pieces.
- For the vertical pieces we will need to subtract the width of the horizontal pieces as well. Therefore, take you vertical measurements and subtract 3-1/4″ and cut 2 boards to that size.
- Join together as shown above with wood glue and screws.
- Cover with hardware cloth.
Repeat this process for the remaining two doors making adjustments in size when needed. Sometimes it takes a little tweaking. At least for me anyway.
Step 6: quail cage removable floor
Here we will go through the same process as the doors except we’ll be measuring the inside where the floor will go AND we will be using 1″ x 2″ boards instead of the 2″ x 2″.
- Measure horizontally the inside opening where the floor will go and subtract 1/4″ from the horizontal measurement. Cut 3 sticks of wood (1 for center to add stability).
- Now measure the vertical width, subtract 3-1/4″ from the measurement and cut 2 sticks of wood.
- Join together with wood glue and screws.
Here you can use smaller screws if you want or need to because the boards are thinner. Place inside floor area and test for size. You may need to trim a tad but not a problem! I hate having to take something apart and redo but sometimes you just have to. So take it apart and give it a little trim. The glue hasn’t had time to set and you’ll be so glad you did when it comes time to remove the quail cage floors for cleaning.Disclaimer:
Some of the links above are affiliate links which means that I receive a small commission on qualified purchases at no additional cost to you. I only recommend products that I would use myself.
- Cover with hardware cloth.
- Screw through outer 2″ x 2″ board into the 1″ x 2″ board to hold into place.
Repeat this process for the other two floors.
You can watch the video as I demonstrate the build and show you what to look for and how each step goes.
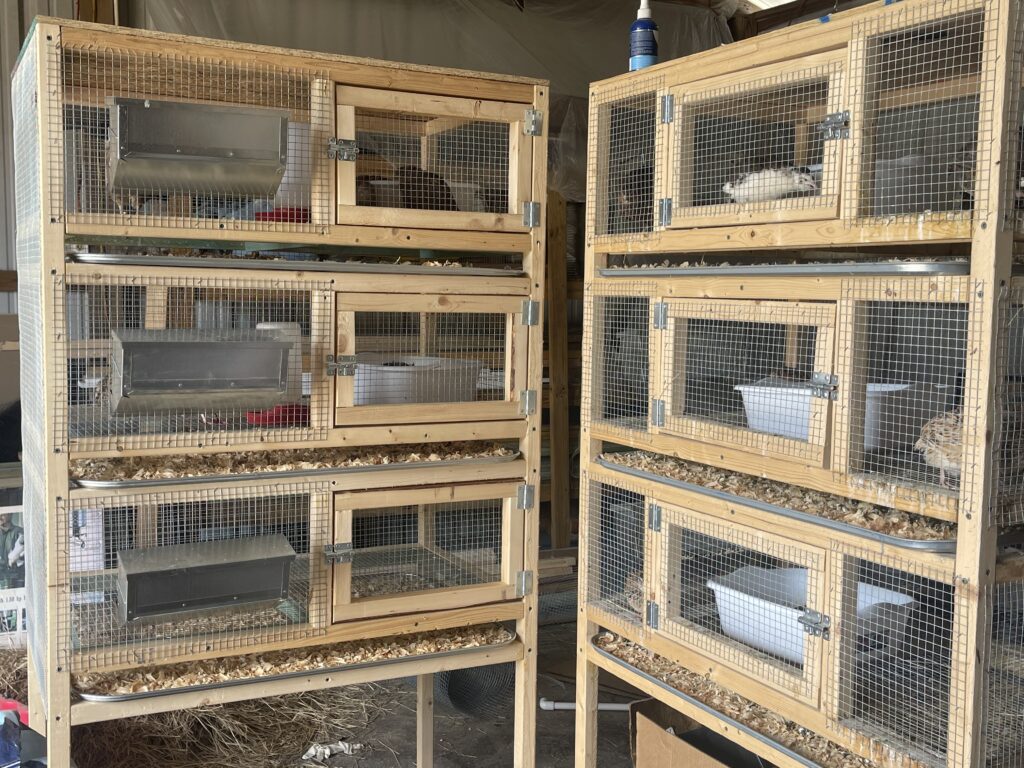
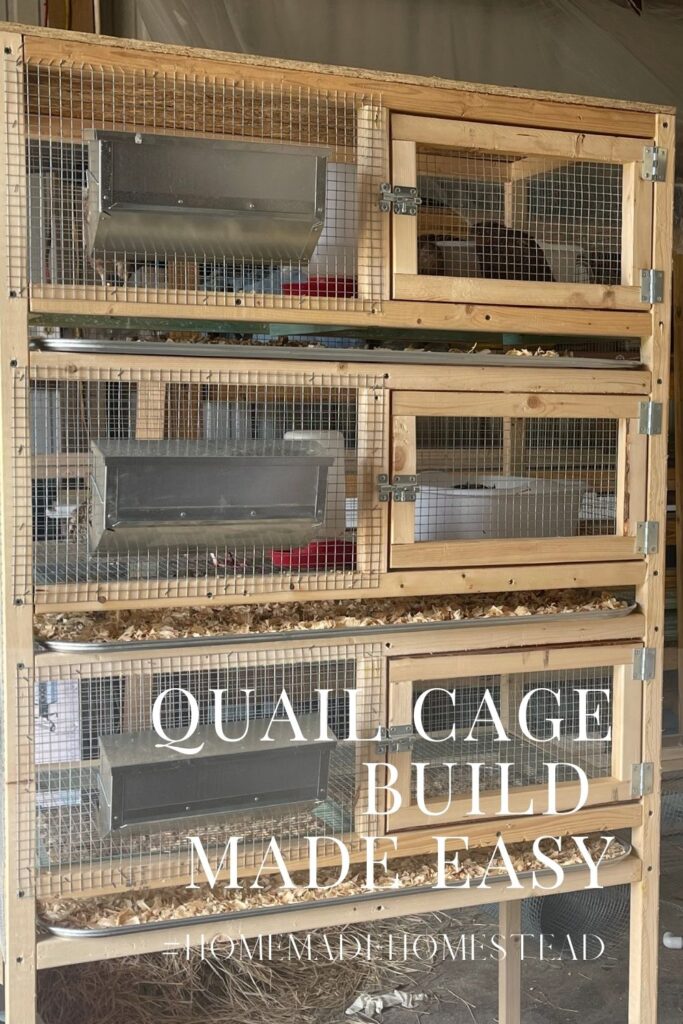
Step 7: the finishing touches
Now it’s time to hang the doors and add the hardware cloth.
Staple hardware cloth to both ends and the back. It’s okay to cover the tray slot on these areas if you like or you can measure and cut cloth to fit the cage opening only. It’s your choice.
- Hang the door on the front and then add hardware cloth to the front opening only. DO NOT cover the opening where the tray will go.
- Nail or screw the 2′ x 3′ sheet of plywood to the top of the quail cage for the roof.
- Add trays
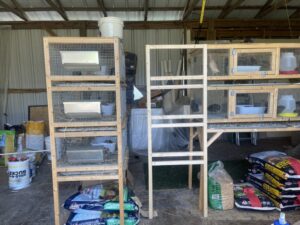
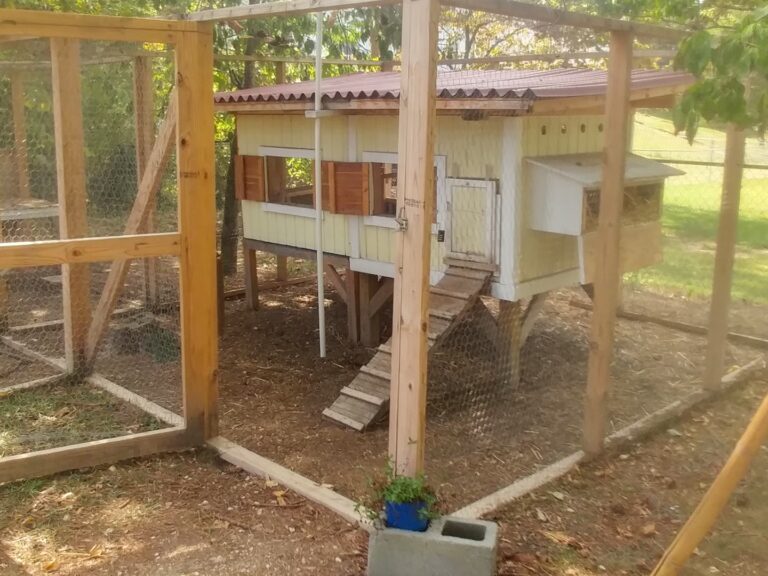
Your quail cage is ready for it’s new inhabitants.
How to Video Links Below for Raising Quail:
- Quail Cage Feeder Install
- How to Lessen the Waste
- DIY Automatic Waterer
- Automatic Waterer Upgrade
- Don’t Let the Flies Overtake your Quail
- Male or Female?
- All of These Quail Eggs!
- Quail Cage Clean Up Made Easy
- Learn to Harvest & Butcher Quail
- Quail for Supper
Find More Homesteading Links Below:
- How to Make Fire Cider
- Build the Best Tomato Trellis for Determinate Tomatoes
- The Perfect Artichoke
- About
- Garlic Rosemary Potatoes
Disclaimer:
Some of the links above are affiliate links which means that I receive a small commission on qualified purchases at no additional cost to you. I only recommend products that I would use myself.
Happy Homesteading!
Marian
If you ever have any questions, please don’t hesitate to ask. I love to hear from you!
We love to hear from you!
At Simply Made Homestead, we embrace the joy of self-sufficiency and creating from scratch. What began as a small dream has grown into a thriving five-acre homestead with goats, chickens, bees, and more.
We’re passionate about traditional skills—handcrafting, gardening, and building—and share handmade goods to bring the homestead spirit to your home.
Whether you’re here to learn, shop, or connect, we’re glad you stopped by. Feel free to reach out with any questions or just to say hello!

Quail Cage Build Made Easy
Equipment
- hand drill
- 1/8" bit (for pre-holes)
- table saw
- clamp, medium size
- wood clue
Materials
- 14 2" x 2" pine boards
- 5 1" x 2" pine boards
- 1 2' x 3' plywood (for roof)
- 24" wide 1/2" hardware cloth (19 gauge)
- 3 36" oil trays
- 6 2" hinges
- 3 2" latches
Video
Notes
 Cut List
Out of the 2″ x 2″ boards, cut:
Cut List
Out of the 2″ x 2″ boards, cut:
- 4 – 70″ boards
- 15 – 21″ boards
- 14 – 36 1/2″ boards
- 3 – 10 1/2″ boards
- 9 – 19 1/2″ boards
- 6 – 36″ boards
- Place a little glue on both ends of a 21″ board and clamp to one end of the 70″ board. Pre-drill stater hole for your convenience and then attac with the screw.
- Attach a 70″ board to the other end of the 21″ board o create the top level (roof edge) of the cage.
- Measure down 12″ from the top on both 70″ boards and mark. Add glue to both ends of 21″ board and screw into place.
- Go down 15-1/2″ from the top on both 70″ boards and mark. Add glue to both ends of 21″ board and screw into place. We will continue this process with the following measurements as follows.
- 27-1/2″ from the top, glue, screw into place.
- 31″ from the top, glue, screw into place.
- 43″ from the top, glue, screw into place.
- And lastly, 46-1/2″ from the top, glue, screw 21″ board into place. It whould look like the image above.
 Step 2: join the sides
First, we ONLY join the backside of the quail cage. You will need 7-36 1/2″ boards.
Step 2: join the sides
First, we ONLY join the backside of the quail cage. You will need 7-36 1/2″ boards.
- Join the 2 sides together at the top.
- Aligh a 36 1/2″ board with the 21″ board that created the side.
- Take 2 – 36 1/2″ boards and place a mark at 17 1/2″
- Join the 10 1/2″ board at the 17 1/2″ mark on both 36 1/2″ boards. Always glueing both ends and then screwing into place.
 Step 4: front assembly
- Attach one of the quail cage frames you just made to the sides beginning at the top.
- Continue this process for the other two cage fronts.
- Place a 36 1/2″ board along the bottom, aligned with the 21″ side board. This is for your bottom tray.
 Step 5: the doors
- Measure the opening where you want the door to be hung.
- Subtract 1/4″ to 3/8″ from the horizontal measurement and cut 2 pieces.
- For the vertical pieces we will need to subtract the width of the horizontal pieces as well. Therefore, take your vertical measurements and subtract 3 1/4″ and cut 2 boards to that size.
- Join together with wood glue and screws.
- Cover with harward cloth.
 Step 6: removable floor
Here we will go through the same process as the doors except we’ll be measuring the inside where the floor will go AND we will be using 1″ x 2″ boards instead of the 2″ x 2″ boards.
Step 6: removable floor
Here we will go through the same process as the doors except we’ll be measuring the inside where the floor will go AND we will be using 1″ x 2″ boards instead of the 2″ x 2″ boards.
- Measure horizontally the inside opening where the floor will go and subtract 1/4″ from the horizontal measurement. Cut 3 sticks of wood (1 for center to add stability).
- Now measure the vertical width, subtract 2-1/4″ from the measurement and cut 2 sticks of wood.
- Join together with wood glue and screws.
- Cover with hardware cloth.
- Screw through outer 2″ x 2″ board into the 1″ x 2″ board to hold into place.
- Hang the door on the fron and then add hardward cloth to the fron opening only. DO NOT cover the opening where the tray will go.
- Nail or screw the 2′ x 3′ sheet of plywood to the top of the quail cage for the roof.
- Add trays.

Finally!…Best build script ever. Thanks!
So glad you enjoyed it!
How would I adapt this to be 2 levels instead of 3? Do you happen to have build plans for that? This looks perfect!
Hi Kali!
I do not have a build plan for the 2 level cage but it’s built with the same measurements as the 3 level cage for the cages in regard to depth and height and the tray spaces are the same. The differences is the width of the pen which is doubled and there are 2 levels instead of 3. So just draw out the 2 level, doesn’t have to look good (mine looks terrible), write down the measurement on each side and then add all of the lengths together. Divide by 8 (length of a 8′ board) and you’ll have the number of 2″ x 2″ boards you’ll need for your 2 level cage.
I’d love to hear how it comes out and if you have any other questions, please don’t hesitate to ask. I’m sorry I’ve taken awhile to get back to you but I’ll try to do better. I have a soap business that I’ve been working very hard to get going online because markets with a 4 year old is difficult plus the summers here in Florida are brutal, lol.
Best wishes,
Marian
Thank you for the clear build instructions.
What thickness of plywood do you use for the top piece?
We used what we had lying around. If it’s inside, you just want something that will keep the cage secure from predators. If it’s outside, you’ll want a thicker piece and one that is pressure treated or you can paint it. If it is outside, be sure to add a good overhand with the roof to help keep the quail out of the weather and keep their food dry.
Hi Marian!
Excellent design! How many quail do you place in each cage?
We place 6 per cage (1 male to 5 females). Works out great! Good fertilization and enough girls to keep the boy from getting rough. Sometimes you’ll come across a male that is just mean, so regard him like a mean rooster, to the pot they go.
Sorry it took me so long to respond. I haven’t been keeping up with my website but trying to do better.