

How to Get the Best Peanut Harvest
Location, Location, Location
It’s true, location really does matter. Peanuts do well in soil that drains well and full sun is a MUST. Do you have high and dry place on your property that receives sun all day long? Then that is the perfect place to start your peanut patch.
A Peanuts Needs
Peanuts like it hot and they take anywhere from 120 to 150 days from planting to harvest. So when you decide to plant your peanuts, make sure you have enough time for your peanut plants to reach maturity before that first frost hits. They love a sandy soil and lots of sunshine. They do need to be watered well but not often once the plants appear. However, while you’re waiting for those sprouts to appear (which seems like it takes forever) keep them watered because they need the moisture to germinate well.
How to Get the Best Peanut Harvest
Peanuts Spacing and Water Set Up
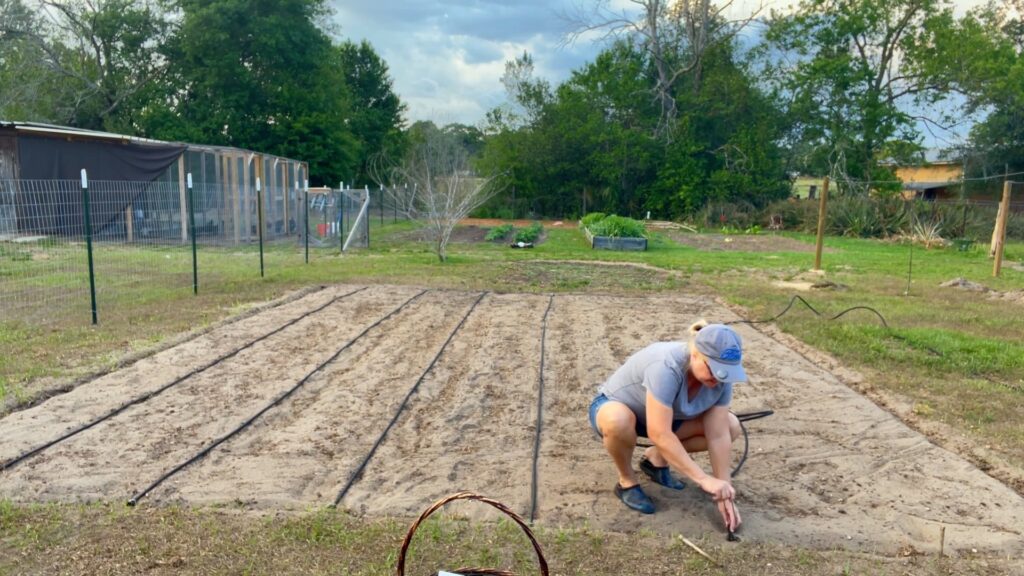
Our plot is 20’ x 30’ but you can make your whatever size fits your space. We do try to make our garden plots as square as possible to help self-pollinating crops. For peanuts you can plant 24” to 36” apart but here our rows are 36” apart because we will be planting on each side of the soaker hose to increase our crop and make the most of our space. We are using a soaker hose rather than watering overhead because we live in zone 9b and the pest pressure in the heat summer is no joke. By watering at ground level really does help.
I began by marking by rows on each end as follows (I just used a stick, worked great): 18” from one side and then 36” between each row. I ran a soaker hose from each stick (marked row). You can watch the video below to see what type of soaker hose I used and how I put it all together. Once the soaker hose was all laid out and connected, I covered the hose lightly with soil to protect from the sun.
NOTE: I would highly recommend drip irrigation if you have it available or are able to acquire it. For us it just wasn’t an option at the time but an upgrade we look forward to.
How to Get the Best Peanut Harvest
Get Ready to Plant
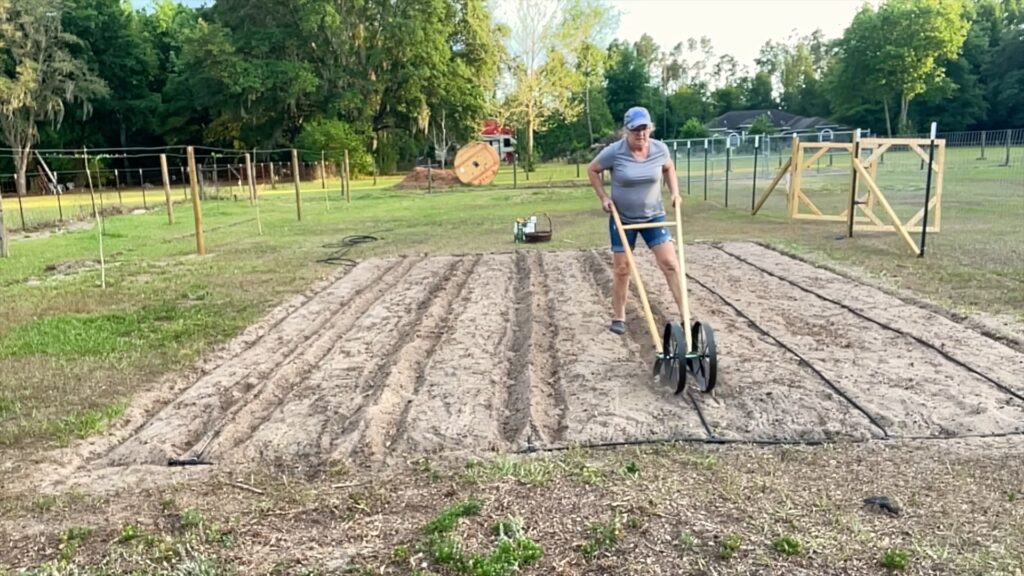
I was fortunate enough to have this Single Wheel Hoe to help me cover the soaker hoses but if you don’t have one, no big deal. Just take a hoe and lightly cover the line by pulling a little dirt up from each side. By doing it this way you’re creating shallow trenches on each side where we will be planting our peanut seeds next.
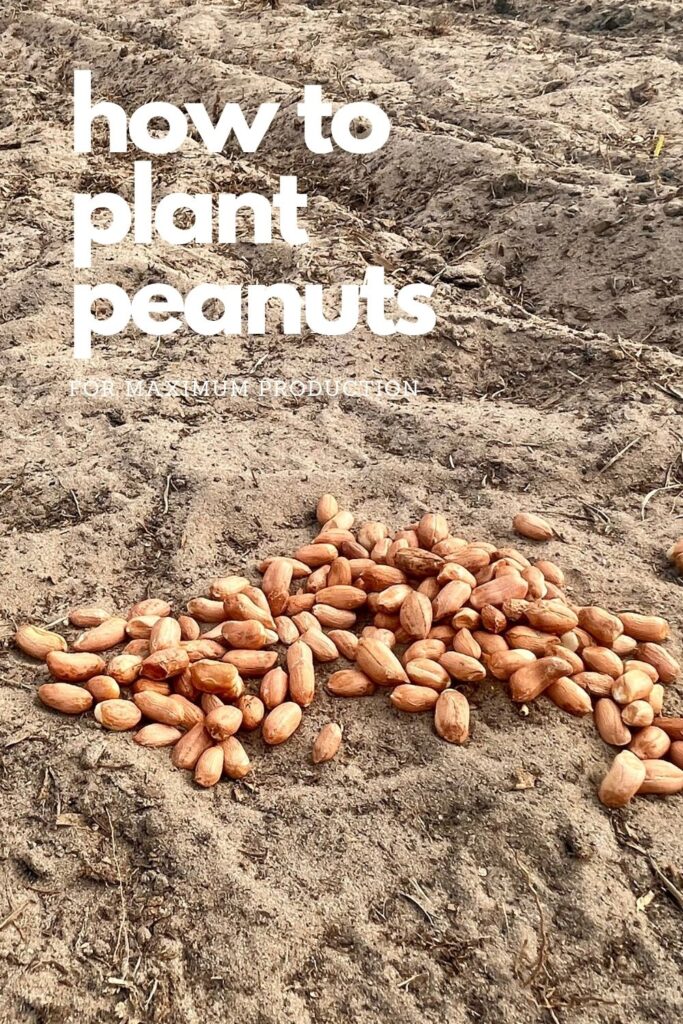
The peanut seeds need to be planted 18” apart so begin on one side of your water line and place a peanut or two. I like to plant 2 seeds per hole of everything, if I have enough available, to increase my germination rate. Move down 18” and plant another peanut seed and so on until you’ve reach the end of the row. I’m big on measuring with my hands, feet, or sometimes a stick so whatever works best for you.
Now that one side of the row has been planted, go to the other side of the water line and place a peanut seed beside the the water line on this side but halfway between the seeds on the opposite side. Continue down the row with this same method. Once you have completed planting your seeds on all of the rows, cover lightly with soil and water well. I left our soaker hose on for about 4 hours. You can see our soil is really sandy so I wanted the peanut seeds to get a good soaking. Then water daily until they have sprouted.
Tools You’ll Need
- garden tiller
- single wheel hoe or garden hoe
- soaker hose or drip irrigation
- peanut seeds
This post may contain affiliate links. We make a small commission if you buy the products from these links (at no extra cost to you). As an Amazon Associate, I earn from qualifying purchases. But I only recommend products we would use ourselves. See my full disclosure here.
Find More Helpful Homesteading Links Below:
- How to Love Through the Fear: GROW CORN
- Quail Cage Build Made Easy
- Let’s Get Dirty in the Garden
- How to Build the Best Tomato Trellis
- How to Easily Germinate Carrots
Happy Homesteading!
Marian
If you ever have any questions, please don’t hesitate to ask. I love to hear from you!
Leave a Reply